

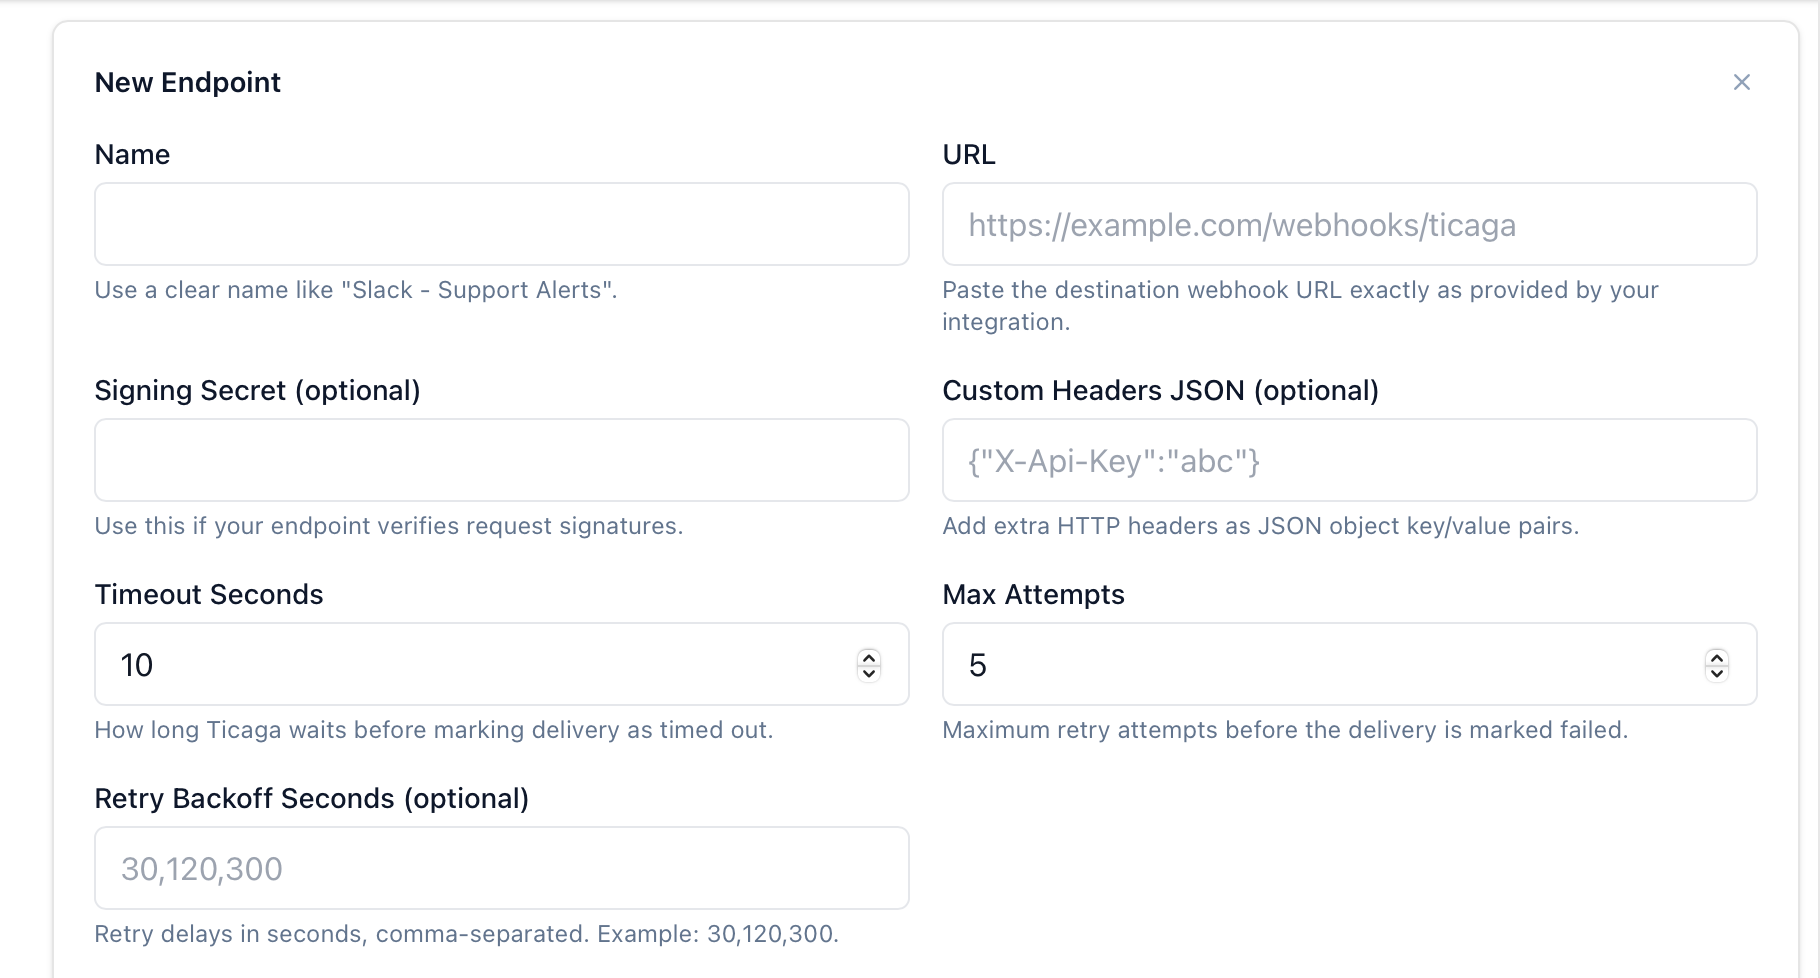
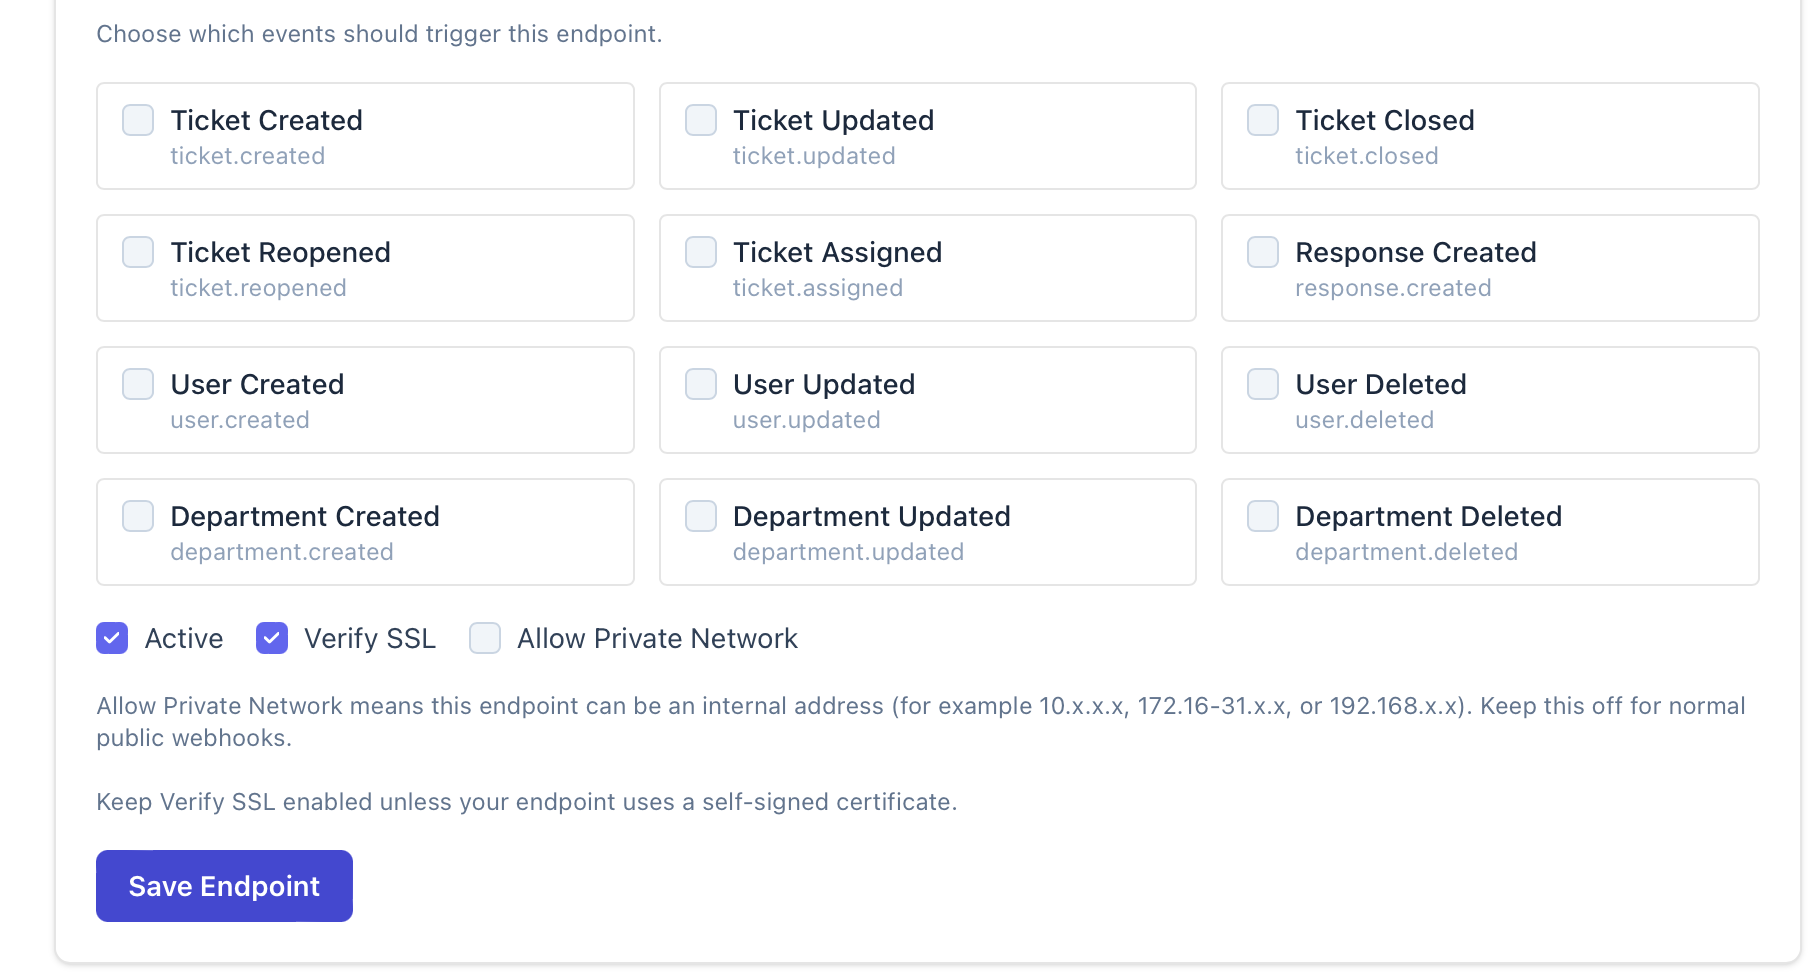
To get started, go to Administration → General Settings → Webhooks, then click Add and you’ll see this form:
Open the settings for the Discord channel where you want Ticaga events to appear:
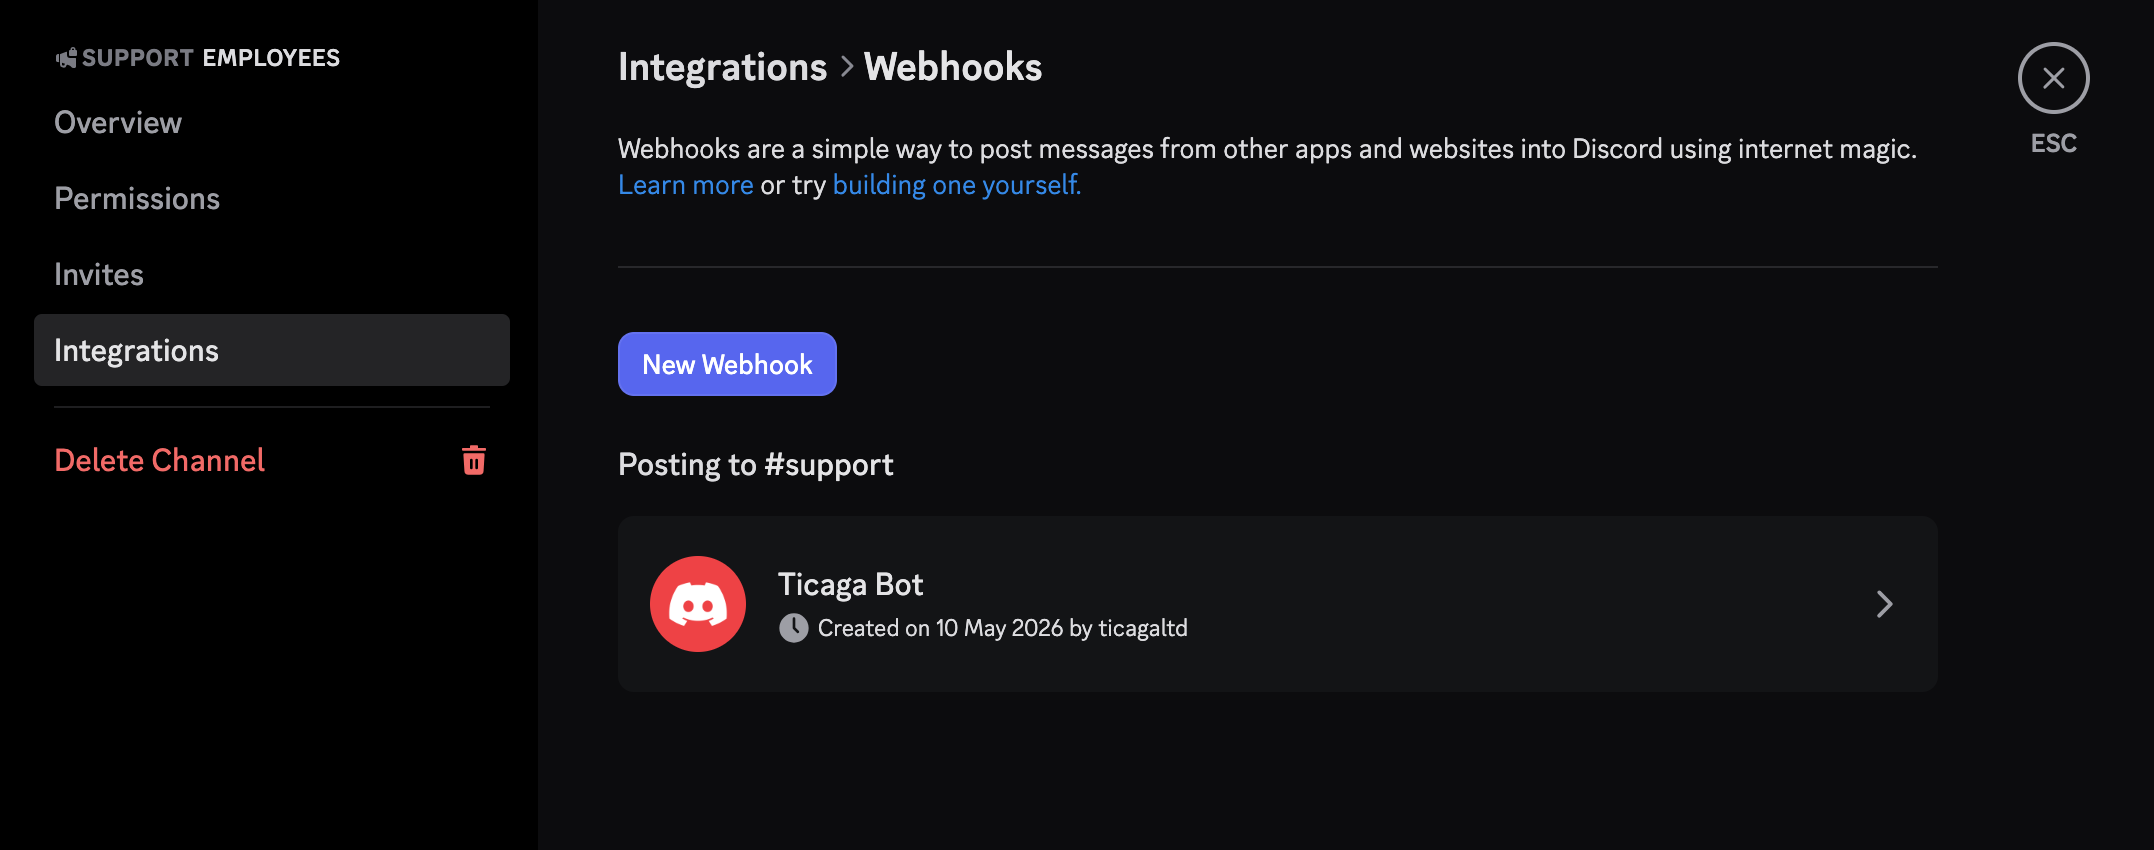
Go to Integrations → Webhooks and copy the webhook URL. Then paste it into the URL field in Ticaga:
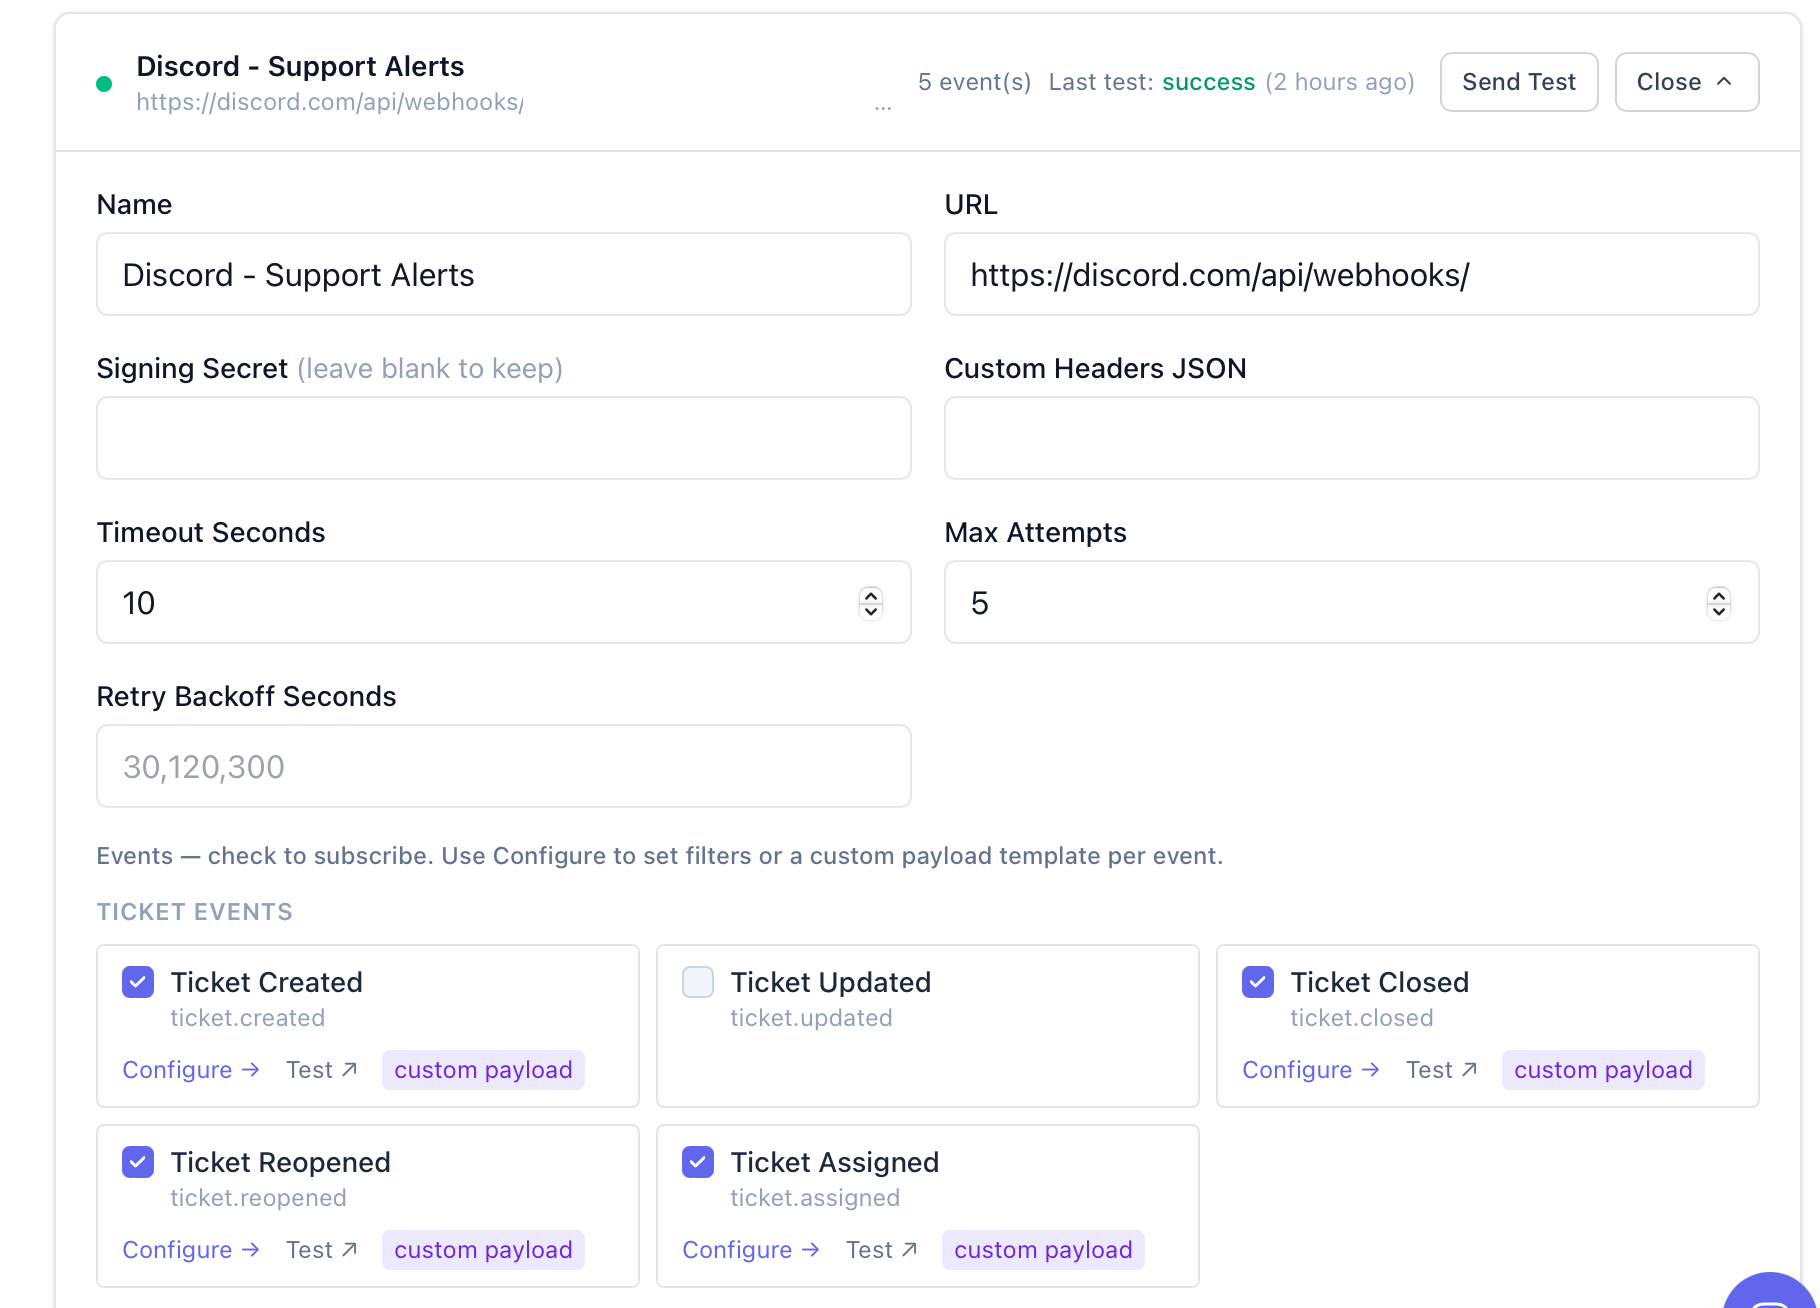
Select the events you want to receive notifications for, then click Save:
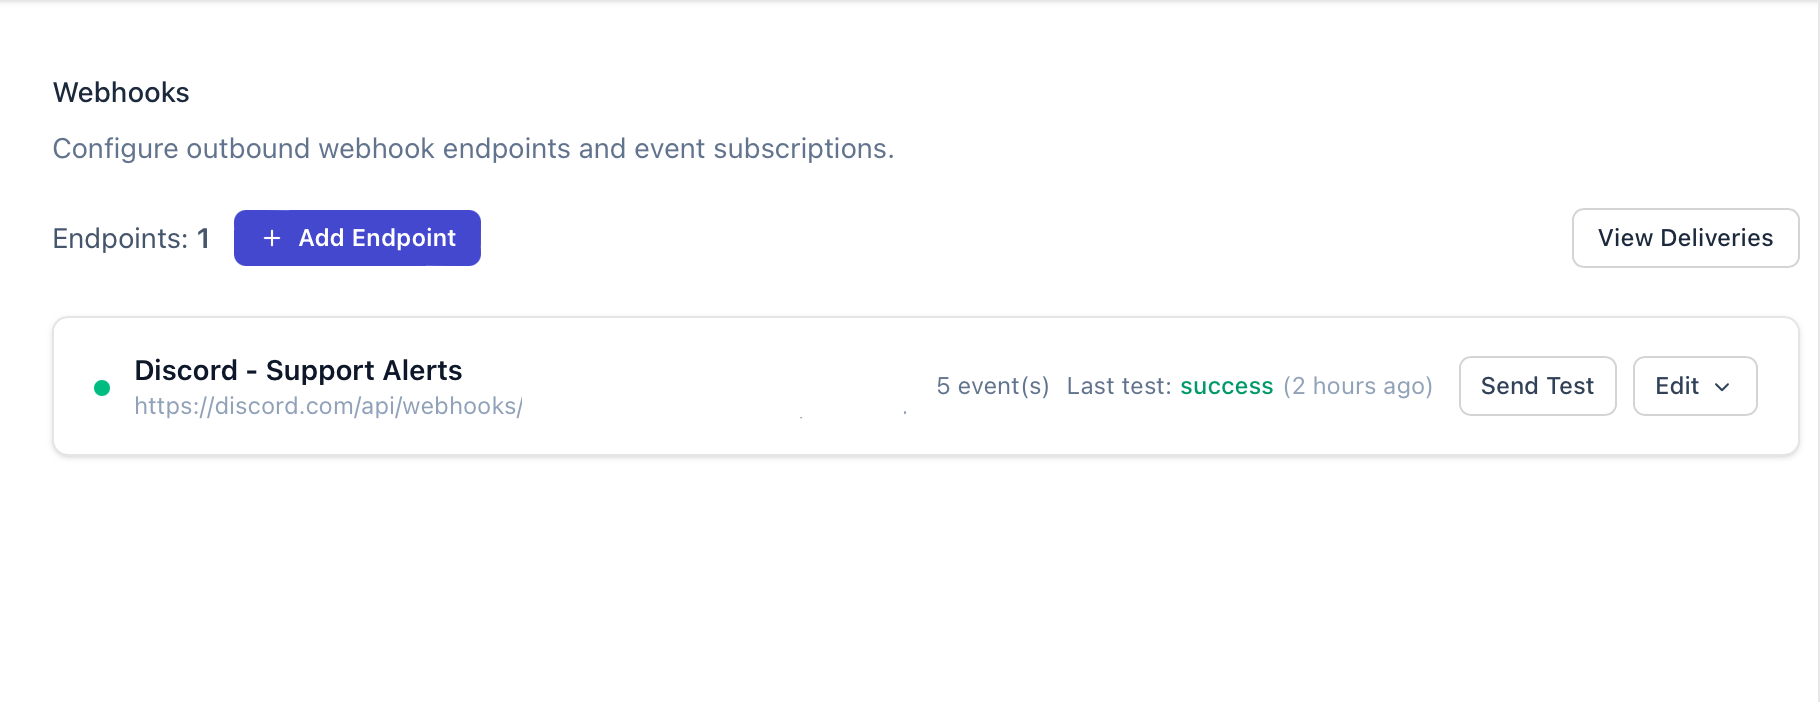
Then click Edit and configure the payload for each event type:
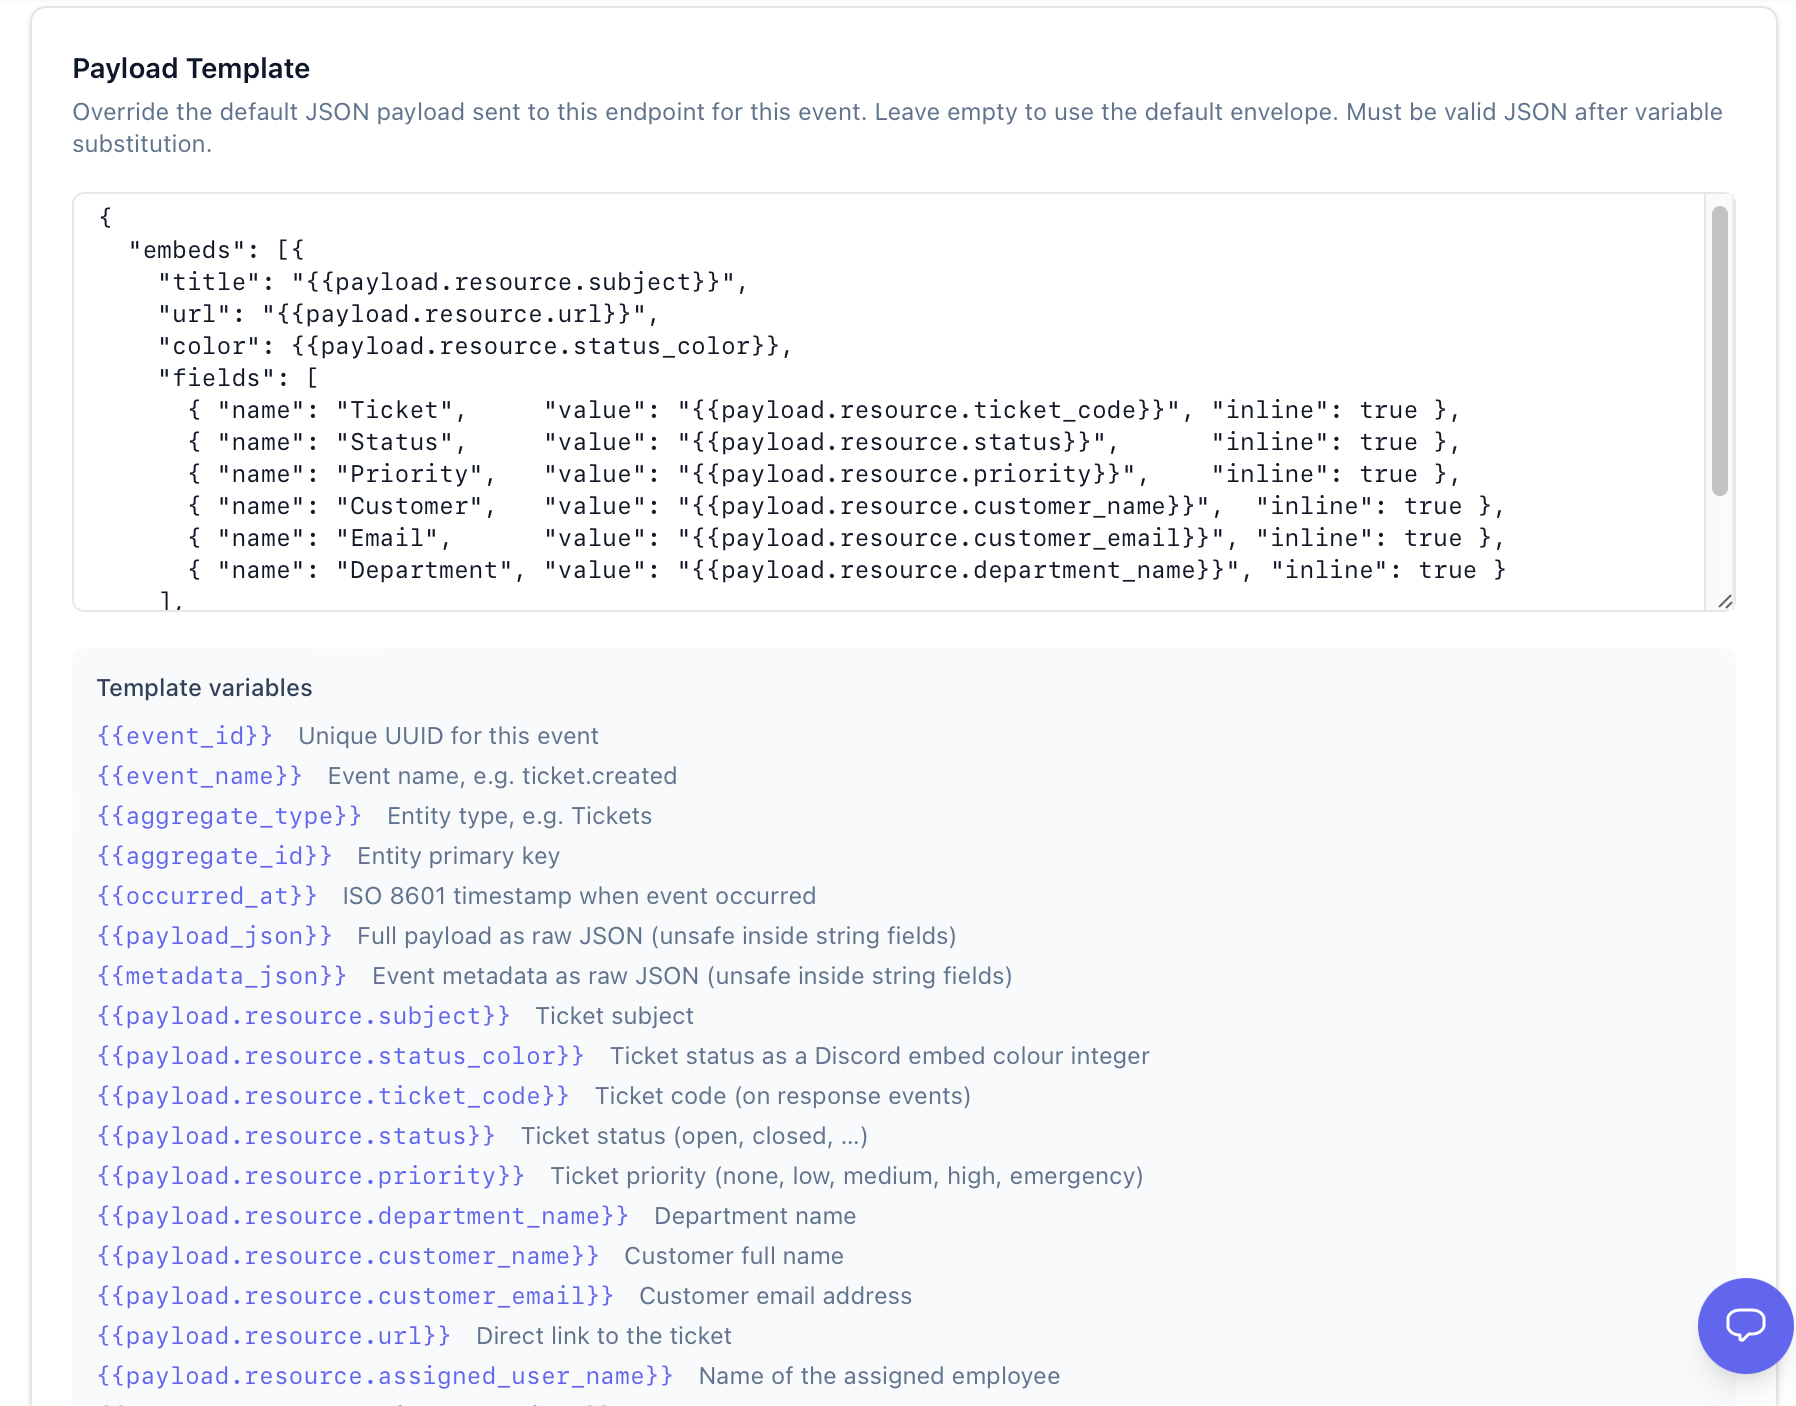
Use the following example payloads for each event type:
ticket.created / ticket.updated / ticket.closed / ticket.reopened
{
  "embeds": [{
    "title": "{{payload.resource.subject}}",
    "url": "{{payload.resource.url}}",
    "color": {{payload.resource.status_color}},
    "fields": [
      { "name": "Ticket",     "value": "{{payload.resource.ticket_code}}", "inline": true },
      { "name": "Status",     "value": "{{payload.resource.status}}",      "inline": true },
      { "name": "Priority",   "value": "{{payload.resource.priority}}",    "inline": true },
      { "name": "Customer",   "value": "{{payload.resource.customer_name}}",  "inline": true },
      { "name": "Email",      "value": "{{payload.resource.customer_email}}", "inline": true },
      { "name": "Department", "value": "{{payload.resource.department_name}}", "inline": true }
    ],
    "footer": { "text": "Ticaga Support • {{event_name}}" },
    "timestamp": "{{occurred_at}}"
  }]
}
tickets.assigned
{
  "embeds": [{
    "title": "{{payload.resource.subject}}",
    "url": "{{payload.resource.url}}",
    "color": {{payload.resource.status_color}},
    "fields": [
      { "name": "Ticket",      "value": "{{payload.resource.ticket_code}}",      "inline": true },
      { "name": "Status",      "value": "{{payload.resource.status}}",           "inline": true },
      { "name": "Priority",    "value": "{{payload.resource.priority}}",         "inline": true },
      { "name": "Customer",    "value": "{{payload.resource.customer_name}}",    "inline": true },
      { "name": "Assigned To", "value": "{{payload.resource.assigned_user_name}}", "inline": true },
      { "name": "Department",  "value": "{{payload.resource.department_name}}", "inline": true }
    ],
    "footer": { "text": "Ticaga Support • ticket.assigned" },
    "timestamp": "{{occurred_at}}"
  }]
}
replies.created
{
  "embeds": [{
    "title": "New reply on {{payload.resource.ticket_code}}: {{payload.resource.ticket_subject}}",
    "url": "{{payload.resource.ticket_url}}",
    "color": {{payload.resource.ticket_status_color}},
    "description": "{{payload.resource.content_preview}}",
    "fields": [
      { "name": "Agent",    "value": "{{payload.resource.agent_name}}",    "inline": true },
      { "name": "Customer", "value": "{{payload.resource.customer_name}}", "inline": true },
      { "name": "Status",   "value": "{{payload.resource.ticket_status}}", "inline": true }
    ],
    "footer": { "text": "Ticaga Support • response.created" },
    "timestamp": "{{occurred_at}}"
  }]
}
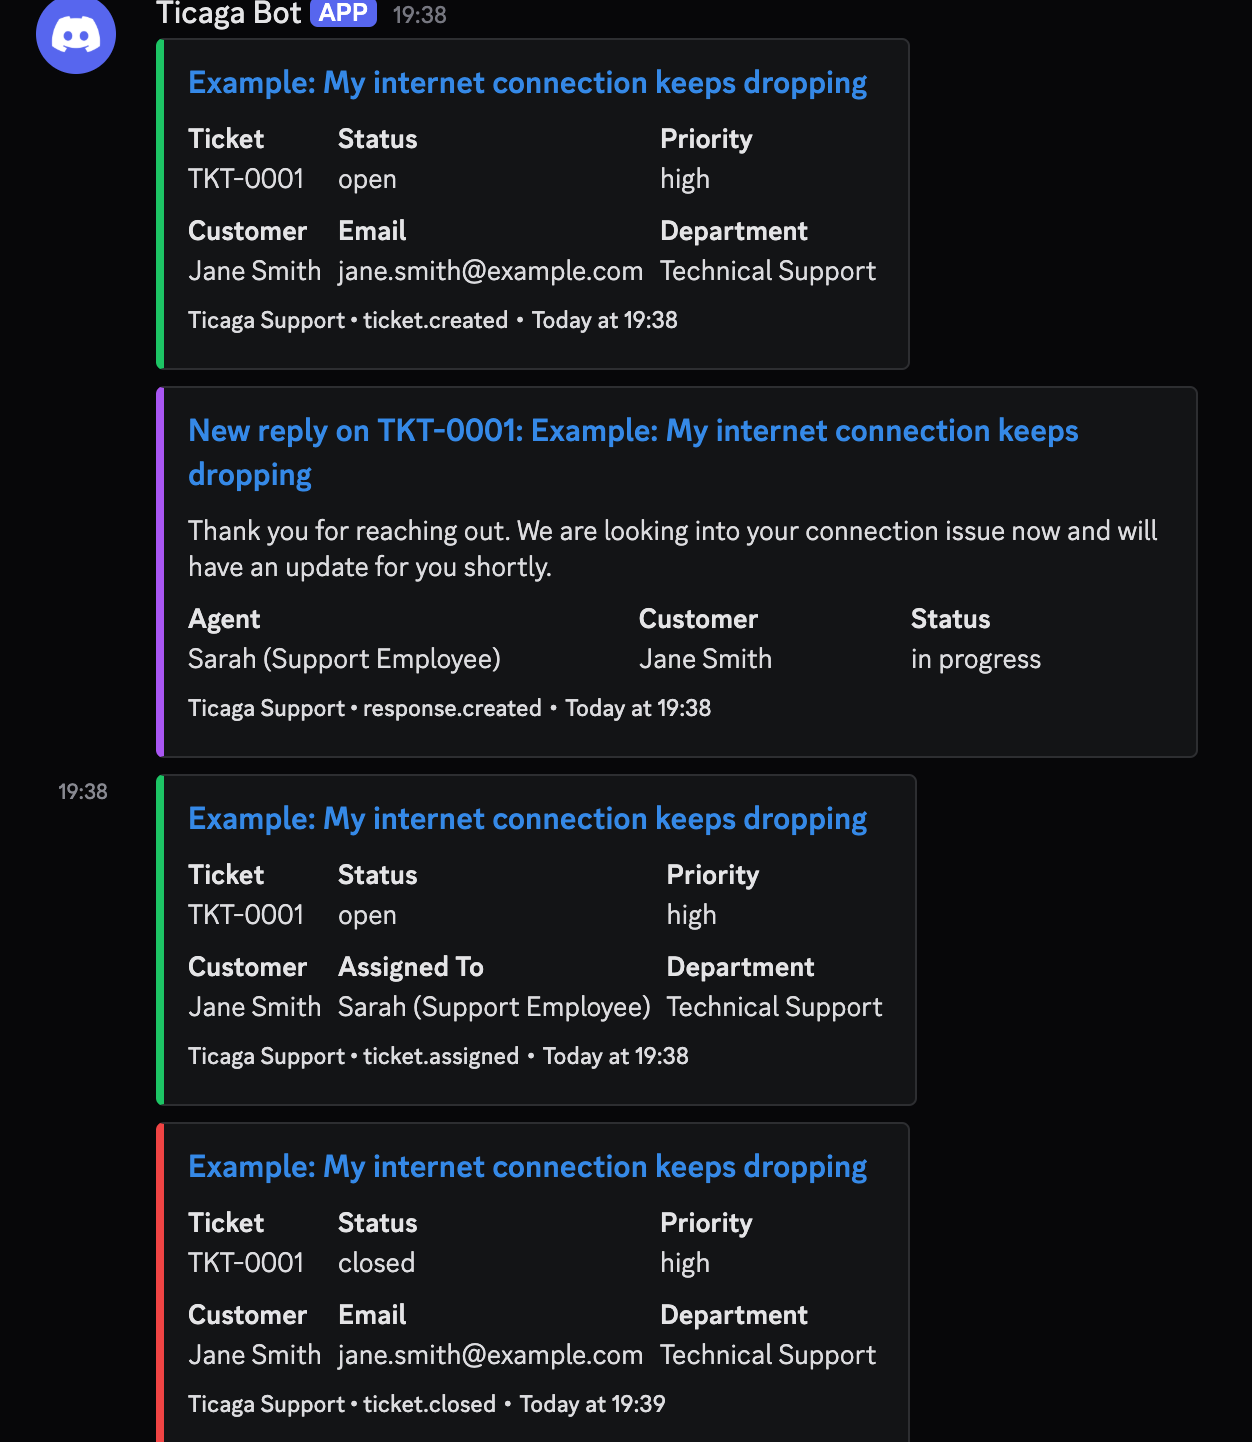
Once configured, updates will appear in Discord like this:

Author
Michael Dance
My name is Michael and I'm the Owner and founder of Ticaga Ltd.
Feedback loop
Be the first to rate this guide.
Article snapshot
To get started, go to Administration → General Settings → Webhooks, then click Config Slack : Follow the instructions on the modal: After c...
When a visitor starts a chat, Ticaga can display their details — name, email, company, and more — directly in the agent's Customer Details panel. Yo...
Follow this guide to sync your Account Manager appointments with the Calendar app on your iPhone. 1. Find your CalDAV details In Ticaga, open t...